When you’ve spent as many years as I have working on Samsung devices, dissecting every model, troubleshooting every quirk, you learn one hard truth: no matter how advanced your phone is, your data is always just one bad day away from disappearing. That’s why if you’re carrying a powerhouse like the Galaxy S25 in your pocket, you owe it to yourself to back it up properly, and I’m not talking about just tossing a few photos into the cloud and calling it a day.
Real protection starts with real control. And nothing gives you more control than backing up directly to a USB external drive. No third-party servers, no Wi-Fi hiccups, no monthly fees, just your data, in your hands, safe and ready when you need it most.
In this guide, I’m going to walk you through how to back up your Samsung Galaxy S25 to USB storage the right way, the way a professional would, so you’re never caught off guard when life throws a curveball. Let’s get into it.
What You Need Before Starting
Before you even think about plugging in a USB drive, let’s get something straight, successful backups don’t happen by accident. They happen because you’re prepared. When I work on a Galaxy S25, whether it’s in my shop or out in the field, I always make sure a few critical pieces are in place before touching a single file. Here’s what you’ll need to do this properly:
1. A Reliable USB-C External Drive or Adapter
Forget the cheap no-name drives you see on discount shelves, those are ticking time bombs. You need a solid USB-C flash drive or an external SSD that can handle large data transfers without hiccups. If you’re using an older USB-A drive, make sure you have a good quality USB-C OTG (On-The-Go) adapter. Speed matters, and so does reliability.
Pro Tip: Look for drives with read/write speeds over 100MB/s. Brands like Samsung, SanDisk, and Kingston rarely let you down.
2. Plenty of Free Space
Check the available storage on your USB device. Your Galaxy S25 is likely carrying tens of gigabytes worth of photos, videos, apps, and documents. Don’t guess, know how much space you need. A half-full drive might seem fine… until it suddenly isn’t.
Rule of Thumb: Have at least 20% more space than the size of your phone’s internal storage. You’ll thank yourself later.
3. A Charged Samsung Galaxy S25
This isn’t negotiable. Backups can be heavy work for a device, and you don’t want your phone shutting down halfway through the process. Ideally, charge your S25 to at least 50%, or better yet, keep it plugged in during the backup.
Pro Tip: Disable battery saver mode while backing up to ensure the phone doesn’t throttle the transfer speed.
4. Basic Familiarity with File Management
You don’t need to be an IT engineer, but knowing how to use the My Files app, locate your folders, and move/copy files is essential. If you’re going to back up like a pro, you need to navigate your device like one too.
When you’ve got all these lined up, you’re not just “ready to back up”, you’re set up for a clean, efficient, professional-grade data backup. That’s the difference between someone who guesses and someone who knows.
Step-by-Step Guide to Back Up Samsung Galaxy S25 to USB External Storage
Now that you’re geared up and ready, it’s time to get your hands dirty, the smart way. I’ve broken this process down into clean, bulletproof steps, exactly how I would handle a client’s device in a real-world environment. Follow this sequence, and you won’t miss a beat.
Step 1: Connect Your USB Drive
- First things first, plug your USB-C drive directly into the Galaxy S25’s port.
- If you’re using an older drive with a USB-A connector, slot it through a quality OTG adapter (don’t skimp, poor adapters cause unstable connections).
- Once connected, the phone should immediately recognize the external storage. You’ll usually see a notification pop up confirming the drive is ready to use.
Pro Move:
- If nothing happens, unplug and reinsert the drive, sometimes the handshake between the device and storage needs a clean restart. Still nothing? Reboot the S25 and reconnect.
Step 2: Confirm USB Detection in Storage Settings
- We don’t just assume, we verify.
- Open Settings > Battery and device care > Storage.
- Scroll down and check under Portable storage or USB storage. Your connected device should appear here.
If it’s missing?
- Double-check your drive’s format (Galaxy devices prefer exFAT or FAT32).
- Try a different USB drive if needed.
Step 3: Transfer Your Critical Files Manually
- This is where you take charge.
- Launch the My Files app (Samsung’s native file manager).
- Tap Internal Storage.
Identify the folders you want backed up, top priority is usually:
- DCIM (Camera photos/videos)
- Documents
- Downloads
- Music
- WhatsApp (if you’re backing up chats manually)
- Select the files or folders, tap Move or Copy, then choose your USB storage as the destination.
Pro Tip:
- Always copy, not move. You want an original left intact on your device in case anything goes sideways.
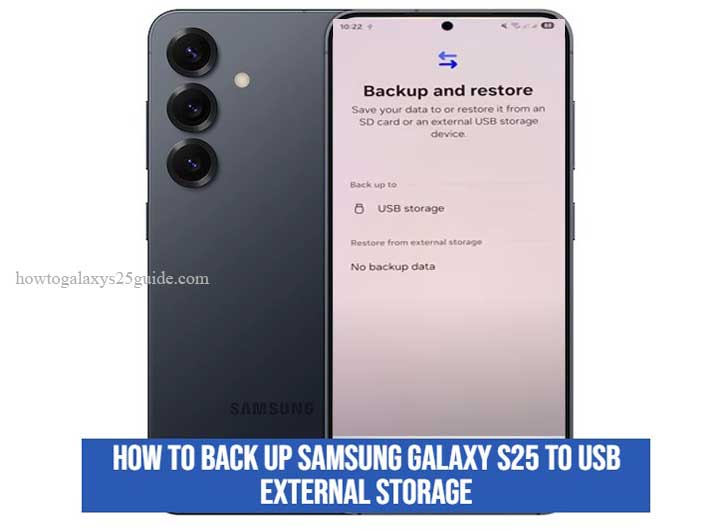
Step 4: (Optional but Highly Recommended) Use the Phone’s Built-in Backup feature
Manual backups are great for custom control, but if you want a full, more comprehensive backup, including app data, settings, and messages, Samsung S25’s built-in backup feature is your best ally..
Here’s how to do it:
- Open the Settings.
- Scroll down and select Accounts and Backup
- Choose External storage transfer (you’ll see your USB drive listed).
- Select the categories you want to back up, or just hit Select everything for maximum coverage.
- Tap Back Up and let the process run. Depending on how much data you have, this could take a few minutes to over an hour.
Step 5: Safely Eject the USB Drive
- You’re almost there, but don’t yank that drive out just yet.
- Always unmount it properly to avoid file corruption.
- Go back to Settings > Battery and device care > Storage.
- Tap your USB device, then select Eject.
- Once the system confirms it’s safe to remove, then, and only then, unplug it.
Remember:
- An unsafe removal might damage your backup files, and trust me, you don’t want to find that out the hard way when you actually need them.
Once you’ve completed the backup, take a minute to open the USB drive and verify the files are there and accessible. A backup you don’t verify is a backup you can’t fully trust. Enable Notifications Reminders on Galaxy S25
Conclusion
At the end of the day, backing up your Samsung Galaxy S25 to a USB external drive isn’t just a “good habit”, it’s the kind of smart move that separates casual users from true pros. It’s about taking full ownership of your data instead of crossing your fingers and hoping some cloud server does it for you.
If you followed the steps above, congratulations, you didn’t just copy files. You built a real safety net, the way we do it behind the scenes at the highest level of device management.
Trust me: in this line of work, I’ve seen too many people show up with shattered phones, desperate for their lost memories or business documents, only to realize too late they had no backup, no plan, and no options. That won’t be you. You’ve just taken the kind of preventative action that seasoned technicians swear by.
Keep your backups updated. Keep your storage safe.
Because in tech, just like in life, it’s not a matter of if something goes wrong.
It’s when. And now? You’ll be ready.